How to Successfully Start Seeds Indoors
Growing plants from seeds is an excellent option as you get to watch them germinate and grow into a healthy plant. Regardless of the type of seeds you want to grow, your ultimate goal is to get successful results. So in this guide, I will walk you through the entire process of starting seeds indoors and obtain amazing outcome.
But before you get started, make sure to purchase seeds from a trusted source to avoid running into seeds starting problems. Well, here’s everything you need to start seeds indoors.
This post contains affiliate links. Whenever you buy something through one of these, we get a small commission without any extra cost to you. Thank you !
Start at the Right Time
To ensure success when starting your seeds, it's crucial to start at the right time. Starting late or too early can disturb the germination process. Most seeds usually started 8 weeks before the frost date. For this reason, you should know the approximate date of the last frost in your region. You can refer to the online frost date calculator according to your climate zone.
Additionally, you can find more information for seed starting time on a seed packet. Instructions on the seeds packet are usually overlooked (I assume it's due to tiny words). But it contains crucial information on how to start your seeds. And some seeds require chilling or soaking before they're planted. Therefore you mustn't ignore to read seed packet to get best results for your seedlings.
Find the Perfect Location
Starting seeds indoors needs planning and imagination to ensure everything fits in a suitable position. You need to decide the right location you have access to indoors, typically a southern exposure which can provide sunshine. But some seeds can't thrive in full sun, so you can use a sheer curtain to get indirect sunlight and block intense light.
If you don't have enough space near the window, you can alternate with grow lights. (I'm going to detail the importance of using a grow light for seed starting indoors in the following section). Furthermore, when choosing the perfect location, consider an organized set-up where your seedlings won't be damaged. You can opt for shelving ideas where you can optimize space, make watering easy, and hang your grow lights.
Use Best Grow Lights
Grow lights are a great option to support seedlings where enough natural sunlight is lacking. They provide supplemental light which can double your success. Sometimes direct light from south exposure may be too much; therefore you can substitute with them. Grow lights come in different types, and they're not all designed for seed starting. Thus it's crucial to choose an appropriate one.
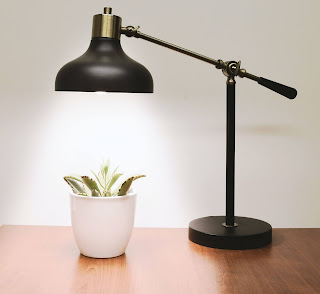
LED grow lighting plan is considered to be the best option. They're helpful for the germination process and higher survival rates which are great for us as growers. Also, they produce adequate heat, which makes them safer for the seedlings. But don't just buy a regular LED bulb. Look for LED lights labeled "full-spectrum," meaning they emulate the crucial quality of natural light.
Then for best results, position the light several inches above the tops of plant foliage. But don't leave them on for 24hrs each day. Cycle them on and off according to your seeds' light requirements. Give your seedlings at least 6-8 hours of darkness per day.
NB: You can put them under the light as soon as your seeds start to sprout.
Pick the Proper Container
All types of seeds have different needs, so to get ready for planting the seeds, you need to pick the proper container. It could be pots, cells, trays, or recycled containers. If you're planning to use recycled containers, opt for something with the perfect look to hold seedlings. Before using it, thoroughly wash it to kill microorganisms that could destroy the seed.
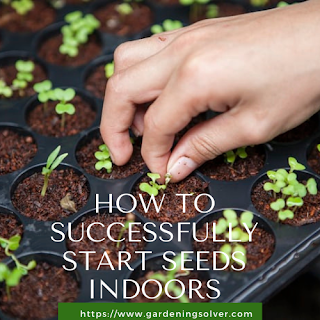
In most cases, choosing the right container depends on the size of the seed and the number of seeds you want to grow. Therefore each kind of seed-starting container has its benefits. But cells are mostly preferred due to their flexibility. When using a cell tray, each plant's root system develops within its own cell, which makes it easier to separate when transplanting.
Above all, make sure the container you want to use has drainage holes in its base because poor drainage can hold water which can lead to mold.
Pot With a Seed-Starting Mix
When starting seeds, a seed starting mix is essential to use. It provides seeds with the moisture as well as nutrients they need to grow healthy. Also, it contains ingredients that help improve drainage. Most people usually confuse potting mix with potting soil, but these two are different. Potting mix is a synonym of seed starting mix or soil-less mix.
Seed starting mix is lightweight and specifically designed for seed starting. On the other hand, potting soil is designed for transplanting and it is too denser with a coarse texture which can disturb sprouting seeds. Therefore you need to ensure your soil is specially chosen for starting seeds.
Additionally, garden soil is another type of soil you should avoi because it may contain weed seeds, pests, and diseases. Apart from that, garden soil is too heavy and improving it may take you a lot of time. For convenience, you can purchase a seed starting mix online or from your local garden supply store and plant your seeds. Before filling your planting containers, start by moistening seed starting mix with warm water on a tub or bucket.
Plant Seeds a the Proper Depth
Planting seeds at the proper depth increases germination rates and allows them to develop into strong seedlings. The exact depth depends upon the type and size of seeds you have. Some seeds need to be set deeper, and others shallower. Therefore it is advisable to read the seed packet carefully. But if you don't have it, you can use general wisdom to figure out planting depth.
Most seeds are usually planted at a depth of twice or thrice the diameter of the seed. If you're working with tiny seeds, place them on the starting mix's surface and barely cover them. This gives them more chances to sprout and grow. But large seeds like beans, peas, and melons require covering.
If you're planting old seeds, submerge them in water for about 20 minutes to check if they're still viable. If they float, they won't germinate, but if they sink, they're good to go.
NB: Don't forget to label your containers immediately after planting if you plant more than one kind of seeds.
Cover the Container With Plastic Wrap
In order to promote the germination process, you need to cover your seed pots or trays with dome or plastic wrap. Even though your seeds can germinate without being covered, there is higher chances of low gemination rate and slow germination.
Thus covering technique is fruitful and help keep the moisture levels constant before the seeds germinate. You can purchase seed starter tray that comes with dome or use any plastic but clear plastic is preferable as it can allow you to check the progress of planted seeds easily.
At this point, you must check the moisture and germination process daily. When you see the first sprouts, you should remove the plastic wrap immediately because tender seedlings can rot if they contact the damp plastic. Then the remaining plants will show up in 2 days.
Avoid Overwatering
When planting your seeds, you'll want the most from them. And to thrive, seeds need the right amount of water. However, properly watering is challenging for a lot of people. First of all, you need to know the type of your seeds. Read a seed packet or search online on how much water your plants need. The rule of thumb is to keep the seeds moist.
Check them at least once a day and never allow them to dry out too much because they'll fail to germinate. When watering, it is advisable to use a spray bottle to avoid ruining seedlings. Using a big watering can at this stage is not recommended as you may end up overwatering. And too much water can rot your seeds.
Harden Off Seedlings Before Transplanting
After nurturing your seedlings, they need to be hardened off before being transplanted. This is an essential idea to improve transplants and doing it is a way of gradually introducing your plants to the outside environment. Seedlings need to adjust to the wind, sun, and temperature slowly.
I recommend you to go through this process for 4 days or just a week if possible. For the first day, choose your hardening spot which is shady. Move your seedlings to your hardening off spot in the late afternoon for an hour, and put them back inside afterward. Then for the following days, you'll be adding an hour more than the previous day until they're ready to be transplanted.
In a Nutshell
When all is done, don't forget to watch out for pests and diseases. Seedlings are just like infants who need extra care, so always inspect the leaves and other parts of your seedlings until they grow into mature plants. You'll be glad about the harvest.
If you enjoyed reading this post, leave a comment below, and feel free to share this post with fellow gardeners!!
You may also be interested in:
Collection of seeds to start indoors
Best seeds to sow directly in the soil
Plants that grow well in Containers

Comments
Post a Comment
Have something to say? Feel free to leave a comment.